Share

Features

Telling Stories

Looking inside the photography of Dan Milner

We featured Dan Milner in a recent Nikon campaign… you know Dan, world traveller, online TV presenter, snow and bike photographer, Chamonix ‘hanger–on’… Luton boy come good (and all with a super dry sense of humour). His bike and his camera have taken him to some of the most remote and fascinating parts of our planet, places that many of us will never see. Of course his job is to record stuff for us (the viewer), but it has seemingly become more important over the years for Dan’s images to give us more. He takes up the story:

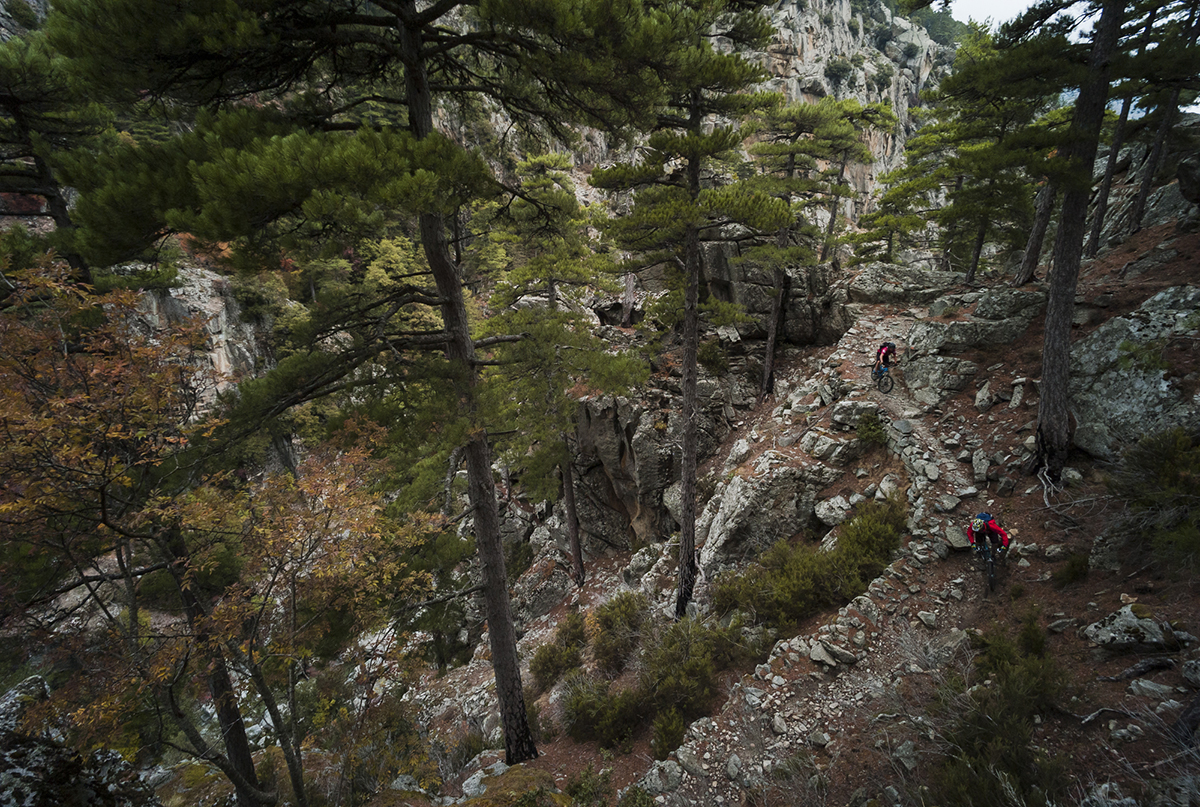
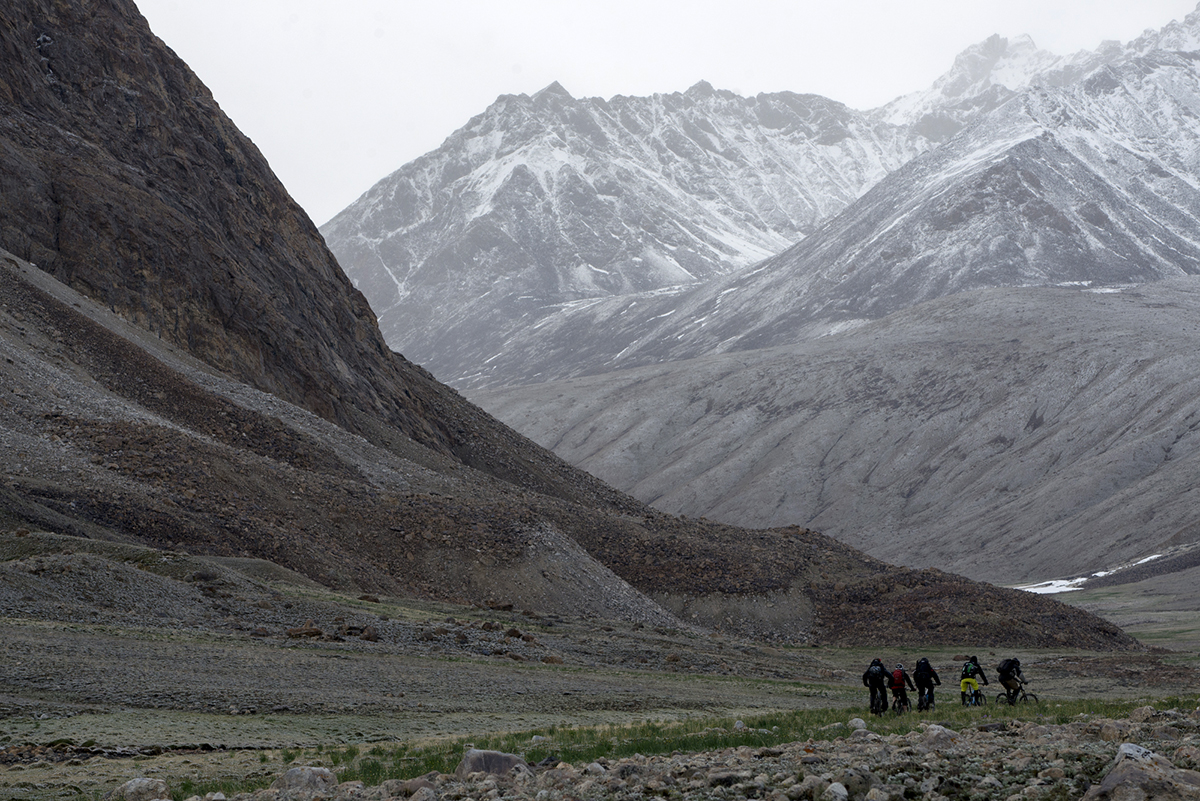
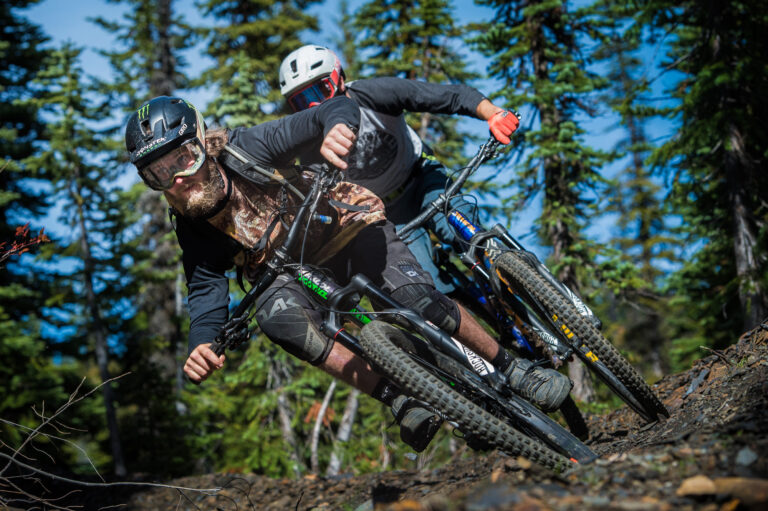
I used to hear all this stuff about a photo “telling a story”. I’d nod earnestly and agree but I never really worked out what the heck that really meant… until recently. Maybe I should have gone to art school and learnt photography properly instead of studying Marine Biology before becoming a self-taught photographer. But whatever. Over the last 18 years I seem to have made my mark in snow and bike photography and have gained the envious (if you can call it that?) position as a go-to photographer whenever someone wants to take either of these sports into more adventurous realms. I’m not lying when I say a lot of these assignments are tough. It’s like war photography without the nightmarish flashbacks. OK, maybe not exactly, but the punishment of tough mental and physical challenges is offset by the rare photo opportunities that I get while shooting these expeditions. Oh and of course there’s always the bonus of riding some incredible trails in truly incredible places.

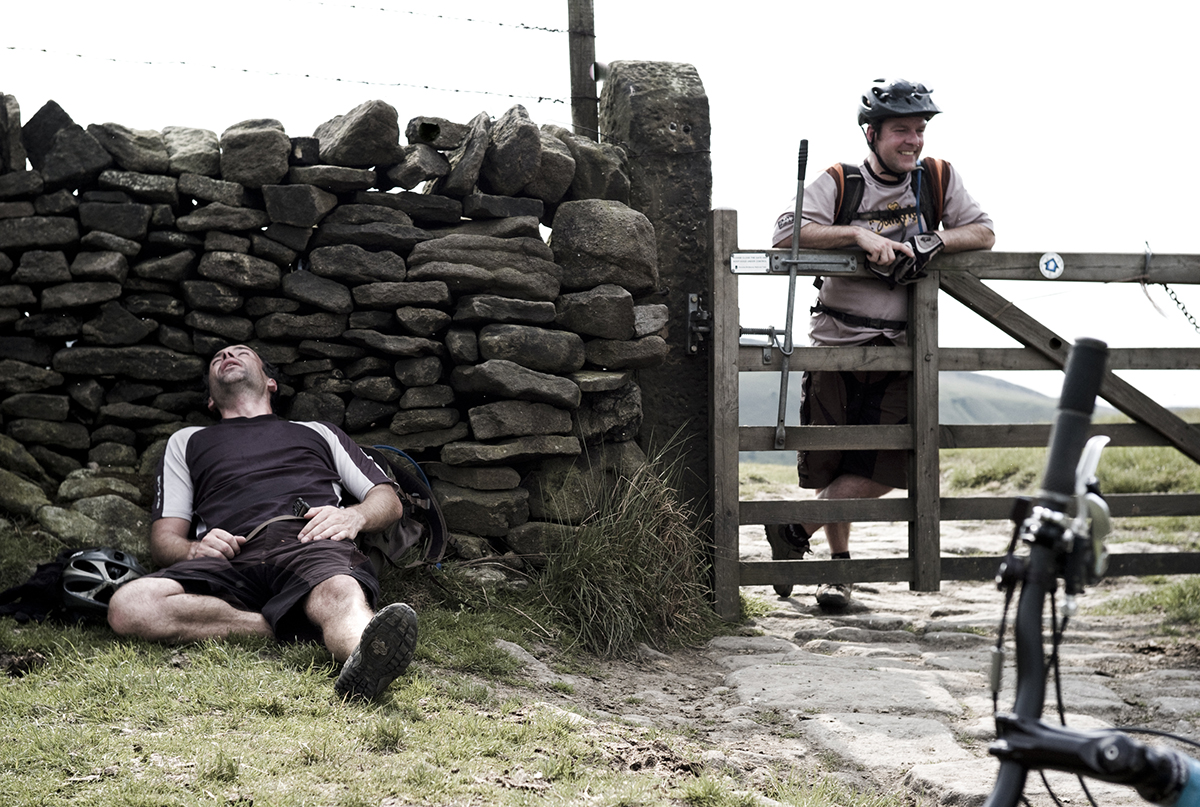
But after all this time as a pro-photographer, only recently have I really worked out what “telling the story” is all about. Until now I seem to have captured it without being conscious of this aim, or at least in not so many words. If I hadn’t then the photos wouldn’t have worked, and my career would have been long gone. So for me, I guess my photography is all about having ‘the eye’ for a shot – seeing compositions and possibilities in the play of light that turn a snap into a banger. Introducing format and details that paint a picture and put the subject in real context is where the story telling comes in. Every time you raise a camera to your eye you have the chance to tell a story, to depict a scene how you want to convey it, to write history as you see it.

So here are a few lessons I’ve learnt about telling stories along the way.

Lesson 1:
Immerse yourself. Getting in tight on the action can really help put the viewer right there, on that windy ridge, railing singletrack with you and your rider. It’s not always an easy shot to get – getting in close means putting yourself in the firing line, or juggling cameras and mud spatter, but it brings a more unique perspective.

This ridge is the start of one of my favourite descents in the world– a full 1300m of singletrack down to the valley floor in Chamonix, France. It’s a pain the ass to reach, even from the lift, involving a 300m rocky, stepped descent through unforgiving boulders (the scene of me breaking my sacrum) and a forty minute hike-a-bike to get to this spot. I rarely go here just to shoot, but if I’m heading out on this ride I’ll usually pack my camera. On this day I fixed a Magic-Arm to my bike to get a fork-eye view of chasing my mate Jez Wilson along the ridge, with the feeling of being ‘right in there’ that goes with it.

Lesson 2:
Find your vantage point. Composition is a big part in making images aesthetically pleasing. Placing the subject a third of the way horizontally or vertically across the image is a basic rule (called the ‘rule of thirds’) for achieving this. Including some curvaceous ‘S’ shape of the trail adds aspiration and lets you nail the shot right when the action is most dynamic in the turn. So look for a vantage point even if it means climbing the hillside above to do so.
About 10 years ago I tried to traverse the island of Corsica, east to west, via the Mar-e-Mar Nord hiking trail. It was a tough four-day ride, with so many hike-a-bike sections and many parts that just felt like we were going the wrong way. But the trail left me with an itch to scratch. Seven years later I went back and re-rode those sections as separate day rides, armed with my 150mm travel Yeti 575 and following gravity. The riding was incredible and one of the highlights was the Tavignano Gorge, a 20km length of technical trail to Corte. It’s a full day’s ride and more remote than you might think.

Lesson 3:
Plan your shot when you see it, not after. Digital has made life easy, letting us convert to black and white or add effects ‘filters’ when you’re back in the comfort of our homes post shoot. It might ‘rescue’ an Instagram-destined snap but it will never make a bad photo good. Deciding what your photo is all about at the time you take it will improve your photography and help tell that story. Looking at a scene as a B&W lets you simplify it. Now you can focus on the shapes, lines and patterns that can bring a B&W photo to life but are lost by the distraction of colour.
This shot of Jez Wilson and Mike Foster, taken around noon on an autumn day could have worked as a colour, but the power of the reflection and the outline of the peaks would have been lessened. It’s shot during a big day out, involving a full 1700m climb and descent along the Val Feret in Italy. Even as (or perhaps because I’m) a pro photographer I don’t carry a camera on every ride. It means I miss the occasional shot, but it means I still get to enjoy my riding and keep a connection with my life-long passion of mountain biking. But the camera sneaks into my pack when I know I’m heading out on a ride like this.

Lesson 4:
Think outside the [horizontal] box. Our online addicted lives mean the vertical (or “portrait”) photo is a dying breed. It just doesn’t work so well on our computer screens. There was once a time when I’d shoot vertical photos with magazine front covers in mind, or knowing that a print magazine needs single page editorial shots, and despite our digital-focussed lives, verticals are often still the best way of capturing the scene and telling the story.
This photo of Tibor Simai was shot during a 3 day traverse of the mountains of Northern Argentina. Our 70km long singletrack trail began in the mountains, passed over a 3200m pass and then descended to the jungle. It was a journey through constantly changing surroundings that threw up a never-ending supply of photo possibilities. As the photographer, I am constantly looking around for possible shots and having to decide whether to stop the group or not as I ride. Sometimes I’ll stop but the shot doesn’t pan out. This stretch of exposed trail, with the bold red earth contrasting against distant rich green jungle grabbed my attention. Pressing myself in against the vertical rock face let me (just) dodge Tibor and convey, by way of the encroaching plants, the way we and the trail ahead were slowly being swallowed up by thick jungle.

Lesson 5:
Don’t fear the darkness. Today’s technology and HDR processing means we can throw light into almost every dark nook and cranny and shadow of a photo. But it’s not always a good thing. Solid blacks and dark shadows are useful tools for strong images, letting you add drama to a scene or silhouette the rider for more impact. The result mirrors that of slide film (which oddly enough due to their limited exposure latitudes didn’t represent what our eyes see anyway) but it means more moving about to find the right angle to make best use of the contrasts in lighting.
This shot of James Richards was taken on our second day of a 4 day, self-supported MTB traverse of Gran Canaria, following the GPS track of an Ultra Trail running race. For 4 days we rode through some of the most enchanting landscapes I’ve seen. Day two was a tough, long day of riding and we dropped into the last descent – a technical 5km of singlerack perched above big cliffs – just as it began getting dark. Riding this trail in twilight had its challenges but it let me capture the dramatic scenery in a different light, and give the ride the ‘out there’ feel that it rightly deserved.

Lesson 6:
It’s not just action. Bike riding is (almost) as much about the culture as the riding and it is very much part of the story of our sport. Having a camera along means being able to capture this culture – the pain, the frustration, the rewards, the post ride beers – as with this shot of Jez Wilson collapsed at the top of a steep Peak District climb, while local Nic Kidd savours the moment. We’ve all been there, on both sides of the fence.

Lesson 7:
Blur can work. The fact that riders are moving, usually quite fast, means that it can be pretty hard to nail a shot pin sharp at times. But that can be used to the photo’s advantage. Blur adds motion and a dynamic that sometimes pin sharp, frozen-action shots lack. I wouldn’t want to ‘blur’ all of my shots, but when you’re immersed in very dark, damp woods in a Scottish winter and having to shoot a slower shutter speed, then blur is part of the deal. You have a choice: either pan with the action to keep the riders sharp and blur the background, or as in this shot, let the riders pass through in a blur to add motion to the photo while keeping the stunning landscape sharp. It depends on the story you are telling. Both techniques have their place even with the advent of today’s high ISO capable DSLRs.
This photo of Joe Barnes and Fraser McNeill was taken during a week-long boat trip along the Caledonian Canal, from Inverness to Fort Bill and back. The idea was to use the boat as our transport and accommodation and put to shore to ride trails where we could. This is one of Joe’s ‘local trails’, a typically steep, unforgiving and slippery foot-wide track down through beautiful forest. My vantage point on a slippery rock gave me the chance to convey what dropping into one of Joe’s trails looks like.

Lesson 8:
Manual Focus has its place. I’m going to confess: I have some of the most advanced cameras ever made and I still shoot most of my mountain bike pictures on manual focus. Sometimes, like for this shot of Joe Barnes above Fort William in Scotland, trying to track the subject through these tight trees with autofocus would be near impossible. Instead, as with many shots I take, I pre-focussed on the corner I knew would be the moment of my photo, reframed the shot and switched the autofocus off. Manually focussing can give you confidence in shots like this as well as more control over your compositions by letting you place the subject towards the edge of the frame away from the autofocus points.
This shot of Joe is one of my favourite mountain bike shots I’ve ever taken. The tangled, impenetrable and bleak screen of trees give it an otherworldly feel, that seems apt for riding in Scotland in November. It might lack the glory of big action but it connects with my type of riding, and having a connection lets you better capture the story.

Lesson 9:
Back off to get the big picture. On multi day trips or big rides in the backcountry it’s comforting to keep the group tight, but by backing off and putting distance between you and the riders you can gain a different perspective of what you are doing and where you are riding, It allows different compositions and lets you capture the a bigger picture of riding through remote places that demand resilience.
This shot is from a 2013 pioneering mountain bike traverse of Afghanistan’s Wakhan Corridor – a vast, high altitude, empty wilderness. Our 3 week trip and 12 day ride was the toughest thing I’ve ever done in 30 years of mountain biking, but it presented a thousand and one unique photo opportunities. Aside from the personal accomplishment of surviving, those are the rewards of being such trips for me. Capturing the team struggling up a long, cold and wet valley after being defeated from crossing the pass by a blizzard the day before was one such unique photo opportunity. Only by backing away could I really do justice to our feeling of fragility in the midst of this powerful landscape.

Kit:
My adventure camera set up is a Nikon D750 (the lightest full frame DSLR Nikon make), and usually the Nikkor 16-35mm f4, 50mm f1.4 and 70-200 f4 lenses. I might swap the 70-200 zoom out for the prime Nikkor 85mm f1.8 and the 16-35 zoom for a prime Zeiss 18mm f3.5 for big rides where I have to carry overnight kit and weight of my pack is an issue. I use the Fstop Kenti and Lotus camera backpacks for my MTB shoots and I’m supported by Yeti cycles.

www.danmilner.com
Twitter @danmilnerphoto
Instagram @danmilnerphoto

Share

Newsletter Terms & Conditions

Please enter your email so we can keep you updated with news, features and the latest offers. If you are not interested you can unsubscribe at any time. We will never sell your data and you'll only get messages from us and our partners whose products and services we think you'll enjoy.

Read our full Privacy Policy as well as Terms & Conditions.

production