There’s not much to a seatpost. It’s just a stick with a seat on one end and a bike on the other. But while riding without one is entirely possible, it’s not something you’d want to do for any length of time. And the humble seatpost is entirely responsible for maintaining your seat in an efficient and comfortable position, and that’s worth putting a bit of effort into.
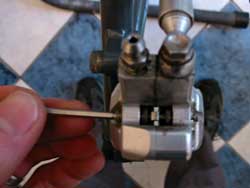
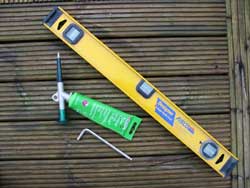 1. Super-simple task, tools-wise. Equip yourself with whatever sized Allen key the bolt or bolts on your post and seat clamp take, plus some grease and a straight edge (or if being posh, a spirit level).
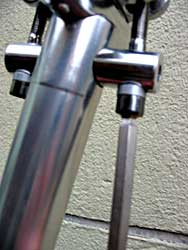
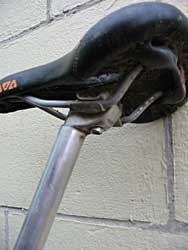 2. There are two basic types of seatpost that you’re likely to encounter. This is the most basic, the layback single-bolt microadjust type. “Layback” means that the centre of the clamp that holds the saddle rails is offset rearwards relative to the centreline of the post itself. Typically, this type of post just has a single bolt. The rails are clamped between two pieces that sit in a serrated cradle atop the post.
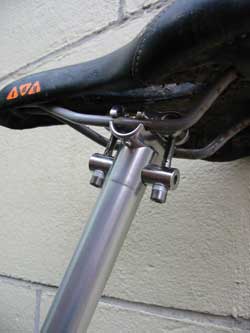 3. The other type of post is the in-line twin bolt type. You can probably guess that “in-line” refers to the centre of the saddle clamp being in line with the seatpost. These usually have two bolts forward and aft of the post. Which type you choose depends on your bike and ride position preference. In-line posts place you further forward, so if you’ve got the saddle right forward on a layback post an in-line one may be in order. Conversely, if you’re running an in-line and the saddle’s right back, look at one with layback.
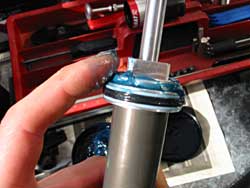
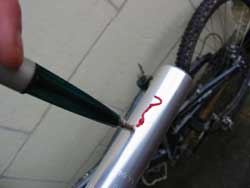 4. Fitting the post to the bike is pretty straightforward. The main thing is to make sure you’ve got the right size. Seatposts are available in loads of diameters, with 26.8mm, 27.0mm and 27.2mm the most common. If you’re replacing a post you should find that the diameter is stamped on the old one. If you’re building up a bare frame, contact the supplier for the right size. Don’t make do with the wrong size – 0.2mm difference may not sound a lot, but it’s enough to do damage… With the right size post to hand, grease up the bit that’ll be in the frame.
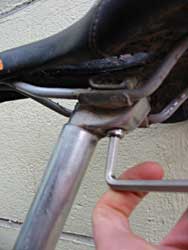
 5. Clean the inside of the seat tube to make sure there’s no grit or other unpleasantness lurking down there. Then slide the post in. To hold it in place you’ll either have a quick-release seat clamp or a simple bolt. Quick releases usually have a knurled nut to adjust the closing tension. The lever should need a firm push to close, but shouldn’t need hefting. Bolts should be snugged tight with a short Allen key. You’ll need to adjust the height once the saddle’s in place so don’t worry too much about it at this stage.
 6. Fitting the saddle can be fiddly, but the trick is not to dismantle the clamp any further than necessary. On a single bolt post, loosen the bolt right off but don’t unthread it from the clamp completely. Twist the top part of the clamp 90 degrees and it should be narrow enough to fit between the saddle rails – you might need to locate one rail then nudge the top part of the clamp over and locate the other side. Once the rails are sat on the lower part of the clamp, twist the other half back straight and tighten the bolt. Make sure the saddle rails are clean and the bolt greased. A light dab of grease on the rails can ward off creaks.
 7. In-line posts typically have more parts, but with any luck undoing both bolts as far as you can without actually taking them apart will give you enough clearance to push the lower part of the clamp out sideways. Then you can position the saddle either by sliding it over the upper part of the clamp from the front (so the clamp passes between the rails at the back of the saddle where they’re further apart), or by putting the saddle over the clamp sideways and twisting it into position or by some other cunning method of your own devising. Then slide the lower part of the clamp back in and snug both bolts down.
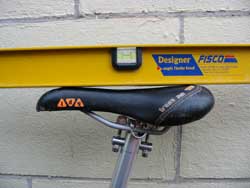 8. Then you just have to tweak the position. Start with the saddle clamped in the middle of the rails and the top of the saddle level. Gauge this either with a spirit level or a ruler resting on the saddle – compare it to something level like a course of bricks by eye. To tilt the saddle on a single bolt post, just loosen the bolt until you can tilt the saddle, position it to your liking and do the bolt up again. On a two bolt post, to tilt the saddle forward loosen the rear bolt and tighten the front one. Or vice versa to tilt it backward. Adjust seat height by sitting on the bike with your bike shoes on. Put a pedal at the bottom of its stroke and place your heel on it. You leg should be straight with you sat on the saddle. Obviously that’s for riding about and pedalling – you’ll probably want to have it lower for drops and jumps and all that malarkey.
From there, go ride and fiddle with the fore-and-aft position until things are comfy. There are no hard-and-fast rules, although most people run their saddles either level or very slightly nose-down. Also bear in mind that you tend to try and sit in a comfy position regardless of where the saddle is, so if you seem to be sitting right on the front of the saddle you probably want to move the saddle forwards and vice versa.