Most brake systems come pre-assembled, filled with fluid and ready to bolt on to your bike. But with such a huge variation in bikes and forks, the manufacturers tend to play safe on hose length and you’re likely to find yourself with unsightly (and potentially hazardous) loops of spare hose all over the place. There’s only so much you can “lose” by way of amusingly circuitous routing and ziptied bundles, but we see a lot of that kind of thing because people tend to be a bit wary of dismantling their new brakes. But fear not – shortening hoses is actually pretty straightforward, and if you take care you won’t need to bleed the brakes afterwards. Here’s how…
We’re looking at a Magura brake here, but most systems are fundamentally similar. Check the manual for your particular brake for any important differences.
 1. The first thing that you need to do is to get the pistons fully retracted into the calipers. The best way to do this is to insert some kind of thin-but-wide tool into the gap between the pads (having removed the wheel first…) and gently prise them apart. Something plastic is ideal, to avoid gouging the pads, but a flat-blade screwdrive is fine if you’re careful. Once the pads are fully retracted, rotate the brake lever on the bars so that the reservoir is horizontal.
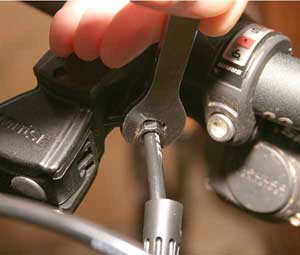 2. Slide any little rubber grommets that may be covering the hose fittings down the hose and carefully undo the sleeve nut from the reservoir. This is often an 8mm nut but it varies between brands. With the nut undone you should be able to gently pull the hose out of the lever. It might need a bit of wiggling to free it, but don’t yank at it. Once it’s out, don’t shake it around too much – you’re relying on surface tension to keep the fluid in. Similarly, don’t pull the brake lever without a hose attached to it…
 3. Now you’re ready to actually shorten the hose. Remember that you can’t add more hose on, so don’t take too much off – the old maxim “measure twice, cut once” is your friend here. We’re using a rather nifty Magura hose-cutting tool here, but you can get equally good results by simply putting the end of the hose on a workbench and slicing the end off with a sharp knife. The main thing is that you need a clean, square cut – don’t use cable cutters or a hacksaw, you’ll end up with a squished and gouged mess.
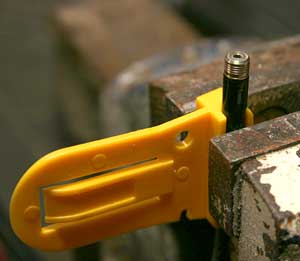 4. Most brake hoses have an insert pressed into the lever end and an olive on the outside. You just cut off the bit with those on, but don’t try to recover them from the bin, you shouldn’t reuse them. Make sure you rescue the sleeve nut and cover, though. Before you fit a new insert and olive is a good time to thread the hose through any tube-style hose guides that your frame may have fitted. To get the insert in, you need to hold the hose firmly without crushing it. Magura brakes come with handy plastic gizmo that you can clip the hose into and hold the whole thing in a vice, and most brake service kits come with something similar or a pair of grooved nylon blocks or something. With the hose securely held, carefully tap the insert into the hose with a hammer. Yes, you need a vice within easy reach of your bike. It’s a good idea to plan ahead – trying to drag the whole thing nearer to the workbench with an open brake lever and unsecure hose is likely to end in tears.
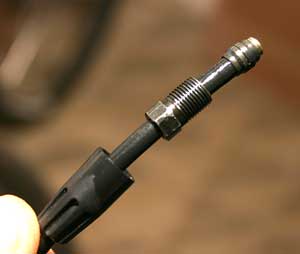 5. With the inser in place, slide the nut cover and sleeve nut on to the hose (making sure that they’re pointing the right way) and then slide a new olive on to the end of the hose. Don’t worry too much about the distance between the end of the hose and the olive, it all tends to sort itself out when you refit it to the lever.
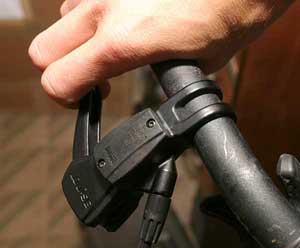 6. Push the hose fully into the lever and do up the sleeve nut until snug (Magura recommends 4Nm/34 in lb – check your manual for other brands). Once its back in place, give the hose a bit of a tug to make sure it’s secure. Pop the wheel back in, squeeze the lever and check for any leaks. You’ll need to pump the lever a few times to return the pads to their original position – once that’s done you’re good to go.

