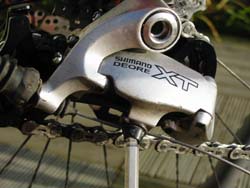
Fitting a suspension fork is a job in the “easy to make a pig’s ear of” category, so don’t tackle it unless you’re confident of your ability to cut things straight and the like…
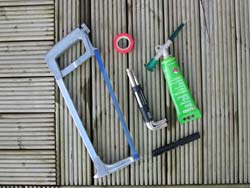 1. You’ll need to wheel out a hacksaw for this job, as well as the more usual Allen keys and grease. Something to mark steerer tubes with is useful too.
 2. Chances are that your bike already has a fork in it, so that’ll need to come out first. Undo the headset top cap and put it somewhere safe. Then undo the stem clamp bolts and lift the stem off. Slide off any additional spacers and any parts of the headset that’ll easily lift off. If you’re lucky the fork’ll come out easily at this point, but usually they need a bit of gentle persuasion with a mallet.
 3. While you’ve got the fork out it’s a good time to clean out the headset, so take all the bearings and seals and things out, making sure you know which way round and in what order they go back in. Then you’ll need to get the crown race off the old fork steerer. We like FSA headsets as they have this split crown race that comes off easily, but usually you’ll need to rest the steerer tube on something and use a punch or similar tool to tap the race off.
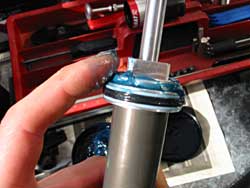
 4. Next you need to put the crown race on the new fork. Split crown races are easy, they just push on. Regular ones need carefully tapping down with something that won’t damage the bearing surface. Or pop down the bike shop for whom it’s a ten second job with the right tool.
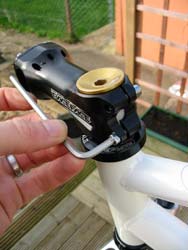
 5. New forks come equipped with steerer tubes longer than anyone will possibly ever need, so they need cutting down to the right length. This is well worth not getting wrong. To establish the right length, reassemble the headset, put the fork back in, add any spacers that used to be there and put the stem on. Don’t worry about greasing things at this stage, it’s all coming apart again in a minute. Mark where the top of the stem sits on the steerer tube, lift the stem off and take the fork out again.
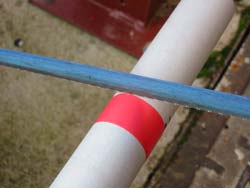 6. In order for the headset to work properly, the top of the steerer needs to end up a couple of millimetres below the top of the stem, so subtract 2mm from the mark and cut the steerer to that length. You can measure the old steerer to double-check. If you’re not sure, leave it a bit long and make up the difference with spacers. You can always make it a bit shorter later, but adding bits is tricky. There’s no harm in having the odd spacer above the stem, either. Cut the steerer with a hacksaw with a decent sharp blade in it. If you’ve got a cutting guide, use it, otherwise use tape and a steady hand.
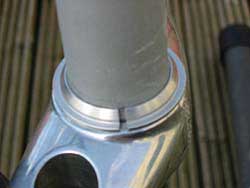
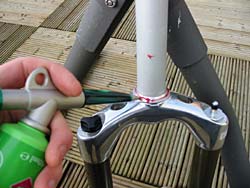
 7. Take a file and clean up the cut end of the steerer tube so there are no burrs or sharp edges on it. At this point it’s a good idea to install the star-fangled nut (SFN) that the top cap tightens into to preload the headset bearings. But we hate the thing, and they’re a pig to get in straight even with the right tool. We much prefer using one of the several head-lock devices on the market. If you insist on using the SFN, thread the bolt into it a little way and use that to tap it into place.
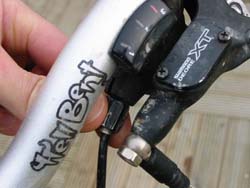
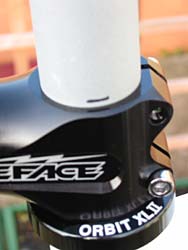
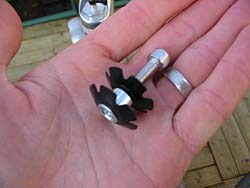
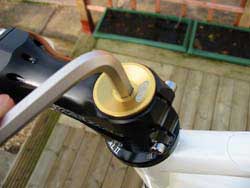
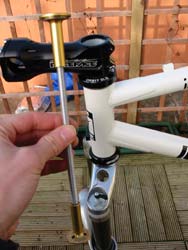 8. If you share our dislike of the SFN, get hold of one of the several varieties of head-lock device available. They’re essentially a big bolt that runs right through the steerer with the added benefit of keeping dirt out of the bottom of the steerer. This one’s a Filthy Ed-Loc, which is very light thanks to the alloy rod used. X-Lite, USE, Azonics and others all do their own versions. You’ll need to cut the rod to length but there’s usually plenty of leeway.
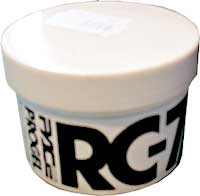
 9. Finally it’s time to put the whole thing together. Get your trusty grease gun out (you can use a big tub of grease and your fingers if you like…), and grease stuff up. Grease the crown race and drop the lower seal (if there is one) and bearings onto the steerer. Put a bit more grease into the bottom headset cup. Grease the upper cup and put the bearings in there too. Put some grease in the top headset race and put it, any other bits of headset, spacers and the stem somewhere handy.
 10. Slide the fork into the steerer, slip the top bits of the headset on, add the spacers and slide the stem into place. Snug the stem clamp bolts up to hold the whole lot together while you find the head-lock or top cap bits. Assemble the head-lock (plunger nut thing in the bottom, threaded rod bit in the top) or put the top cap on and thread the bolt into the steerer tube. Then it’s just a matter of adjusting the headset. Loosen the stem clamp bolts, tighten the top bolt until the fork rotates easily but doesn’t knock back and forth, retighten the stem clamp bolts and you’re done.