The march of technology is such that just as you get used to fettling something, it’s rendered obsolete by a new and improved thing. So it is with cranks and bottom brackets. The shift many years ago from cup-and-cone BBs to fit-and-forget cartridge units made things a whole lot easier to deal with, while the gradual move towards splined axle/crank interfaces makes that oft-troublesome area somewhat more foolproof. None of these developments have fundamentally altered the fitting procedure, though, which has in essence remained at “put bottom bracket in frame, put cranks on axle” for ages.
Shimano’s Hollowtech II system, first seen on XTR in 2003, found on XT and Saint in 2004 and LX and Hone for 2005, is an entirely different animal. The good news is that fitting has got simpler again – you can fit a set of these in about five minutes.
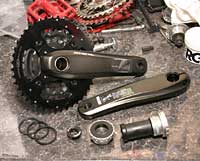 1. Here’re all the bits ready for action. The only bit that you can’t see here is the axle itself, which is permanently attached to the drive-side crank arm and lets it stand up on the workbench as if by magic. Not shown are two tools that you can’t really do without that you don’t get – the TL-FC32 for fitting the bearings and the TL-FC16 for fitting the left-hand crank. Park’s BBT-9 handily incorporates both of these into one tool.
 2. Before you start, you may need to do some preparation to your frame. Conventional cartridge-style BBs have both bearings fitted to an integrated unit, so they always line up right. Hollowtech II bearings are a separate unit each side, so it’s essential that the faces of the BB shell are flat and parallel. This isn’t always the case (particularly since with cartridge BBs it wasn’t really necessary) so get a clued-in shop to face the BB shell and chase the threads. If they look at you blankly when you ask for this, find another shop.
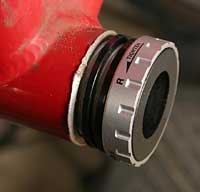 3. Conventional bottom brackets come in a bunch of different sizes to accommodate different shell widths, cranks and the use or otherwise of E-type plate-mount front derailleurs. HTII is a whole lot simpler – one size fits all. You get three 2.5mm spacers in the box, which sit behind the bearing cups in different combinations according to shell width and front mech mount. Here we’re using a 68mm shell and a band-on front mech, which needs two spacers on the drive side and one on the non-drive side. If we were using an E-type mech we’d leave out one drive-side spacer and replace it with the mech plate. For 73mm shells you’ll need to leave out the non-drive side spacer and run either one spacer or the mech plate on the drive side.
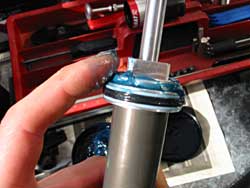
 4. Grease is important for fitting Hollowtech II. You’ll need to put grease (or anti-sieze) on the bearing cup threads. If you’ve got a well-prepped frame the cups should spin most of the way in by hand, needing the special spanner that you didn’t realise you needed and had to wait a week for just to snug it home. Remember that the drive-side cup threads in anti-clockwise.
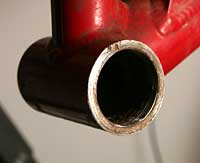
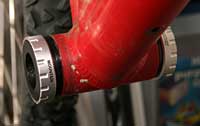 5. Once both cups are in you should have something looking like this. You can see how the bearings are carried outboard of the shell. Freed from the size constraints of having to fit inside the shell they can be a lot bigger, accommodating a much bigger axle. They’re also spaced considerably more widely, also good news for stiffness and durability.
 6. With the bearings in place it’s time to fit the cranks. Getting the drive-side on is a simple matter of greasing up the axle and pushing it through the bearings. It should just slide in fairly easily. There’ll be a stiff bit when the end of the axle reaches the non-drive side bearings – a gentle tap will see it through.
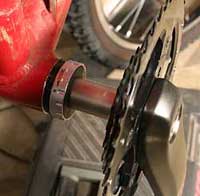
 7. The left-hand crank fits on to splines in the end of the axle and is secured by pinch bolts in the style of three-piece BMX cranks. The arm’ll only fit on the axle one way – there’s a wide bit on the splines. Grease up the splines and push the crank on.
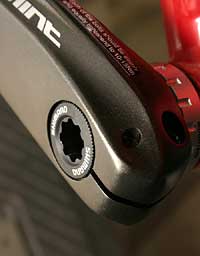 8. At this point the second of the tools that you don’t have comes into play. Grease the threads on the end cap that should be the only bit you’ve got left and thread it into the end of the axle. This cap pulls the crank on to the axle but doesn’t hold it in place – it’s a bit like the top cap on a threadless headset. Use the TL-FC16 or BBT-9 to tighten it. It doesn’t need to be done up very much, you’ll be able to feel when it’s home. Don’t overtighten it or the bearings’ll get very stiff.
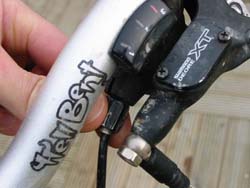
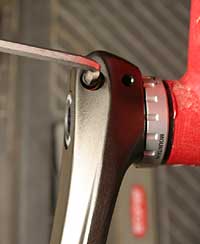 9. The left-hand crank is secured by a pair of opposing pinch bolts. They come with grease on them (no harm checking, though) so you just need to tighten them up. As with all paired bolts, alternate between the two until they’re done up. If you’ve got a torque wrench, 10-15Nm are the magic numbers. Give the arms a good wobble when you’re done – if anything moves or clonks, something’s not right.
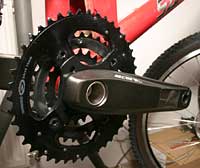 10. And there you go. All that remains is to put some pedals on, not forgetting to include the supplied pedal spacers on both arms.