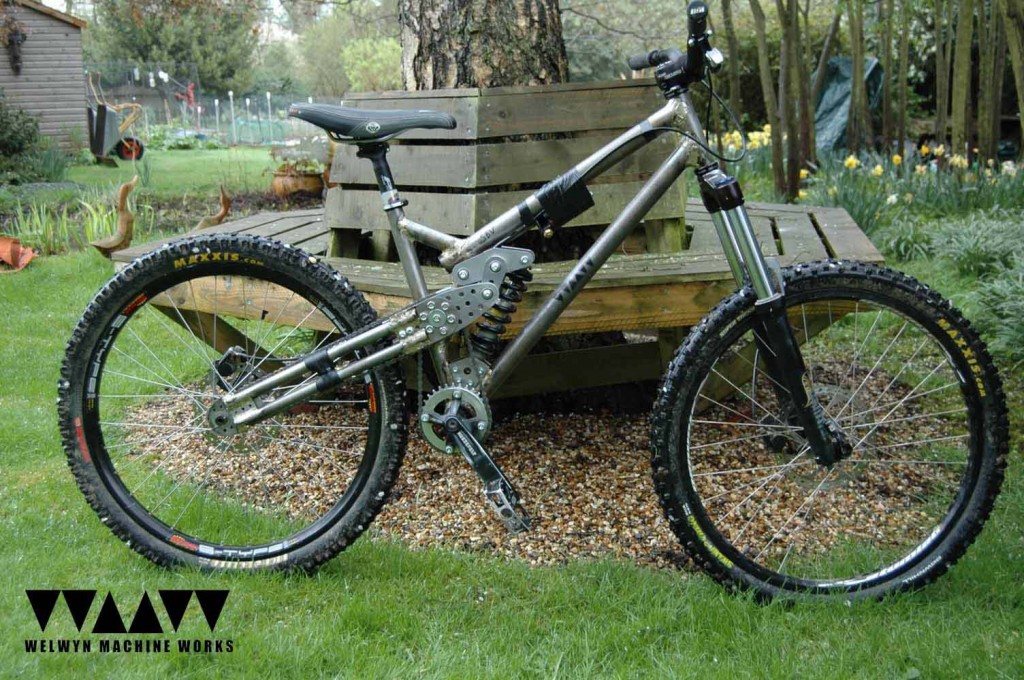
Continuing in our series on homemade bicycles, here is Mark and the Welwyn Machine Works SBV.
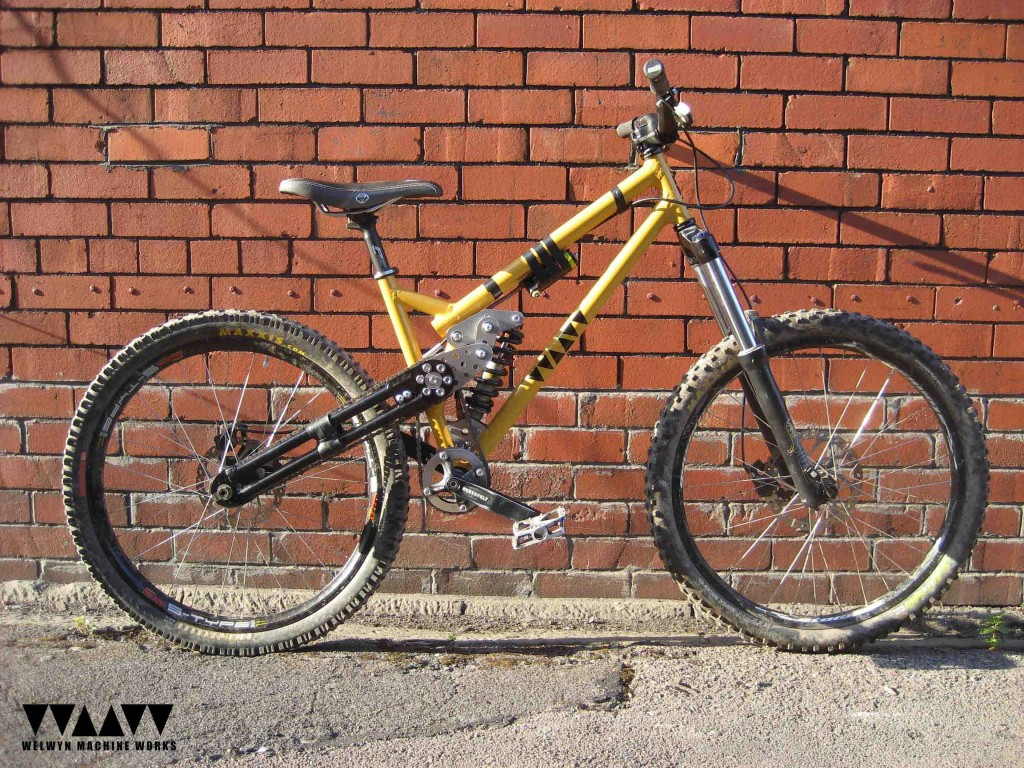
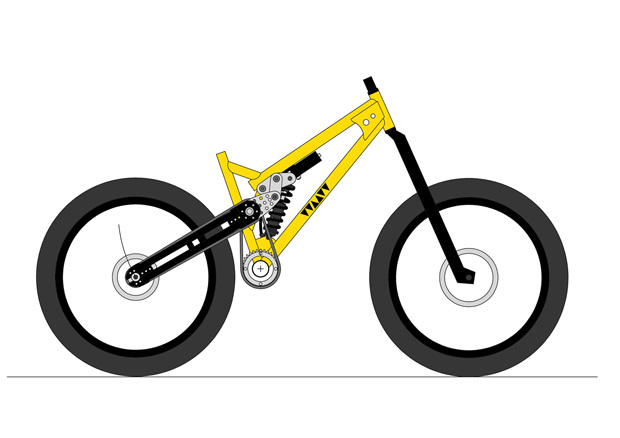
Mark’s creation, the WMW SBV
Having recently seen the excellent Bedfo Super Bike on the Dirt website and Billy’s call to other homebrew builders to get in touch, I thought some of you might be interested in seeing the bike I built for myself a couple of years ago – the Welwyn Machine Works – SBV (silent but violent).
Intro
Below is a summary from a blog (www.welwynmachineworks.blogspot.com) I originally wrote to accompany my bike project, which was meant to document the project and gives more background info.
Start
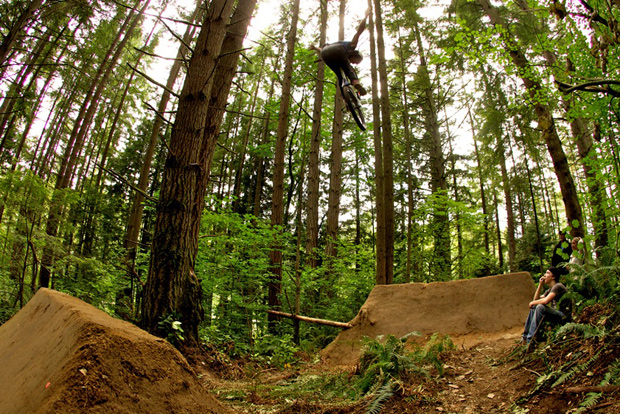
Back in 2003 I saw an article in the Sept/Oct issue of Dirt on Brooklyn Machine Works’ FQ Mini link, and the quirkiness of it just caught my imagination:
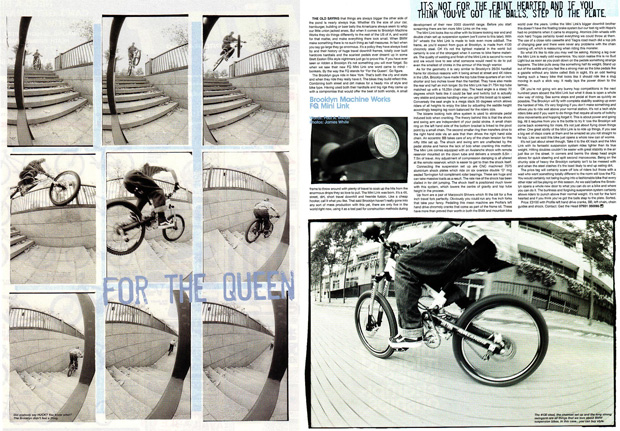
Back issue of Dirt on Brooklyn Machine Works’ FQ Mini link
The expense of the BMW frames combined with a lack of riding prowess meant I could never really justify getting such a high end frame. However I enjoy designing and building stuff so thought maybe I could build my own version, (though at the time the last bit of serious metal work I’d done had been making a metal key fob years ago at school).
Design
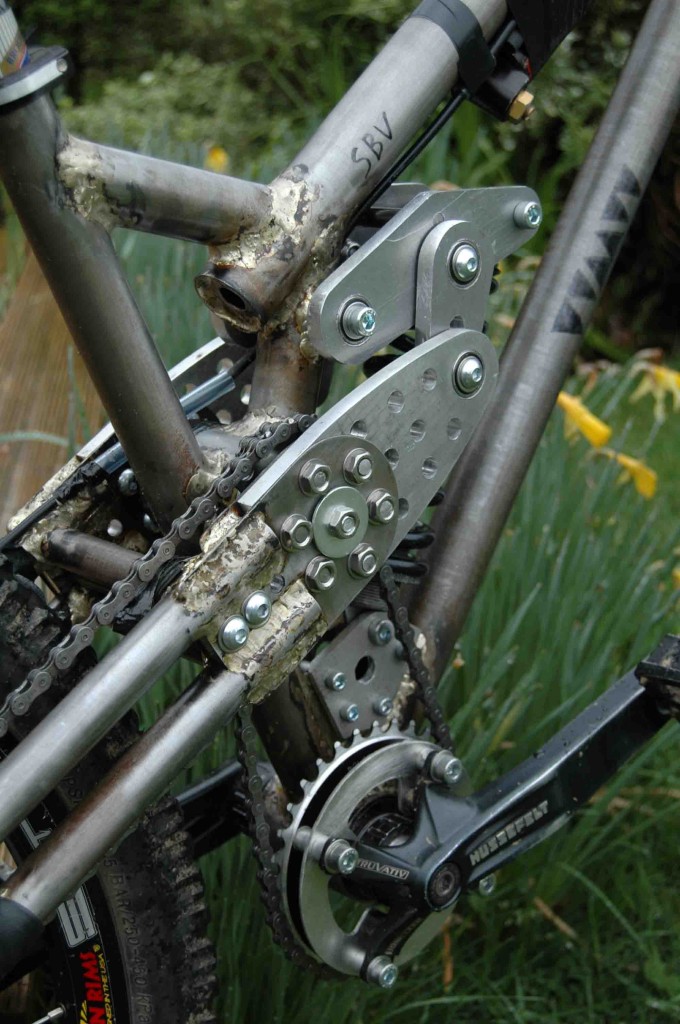
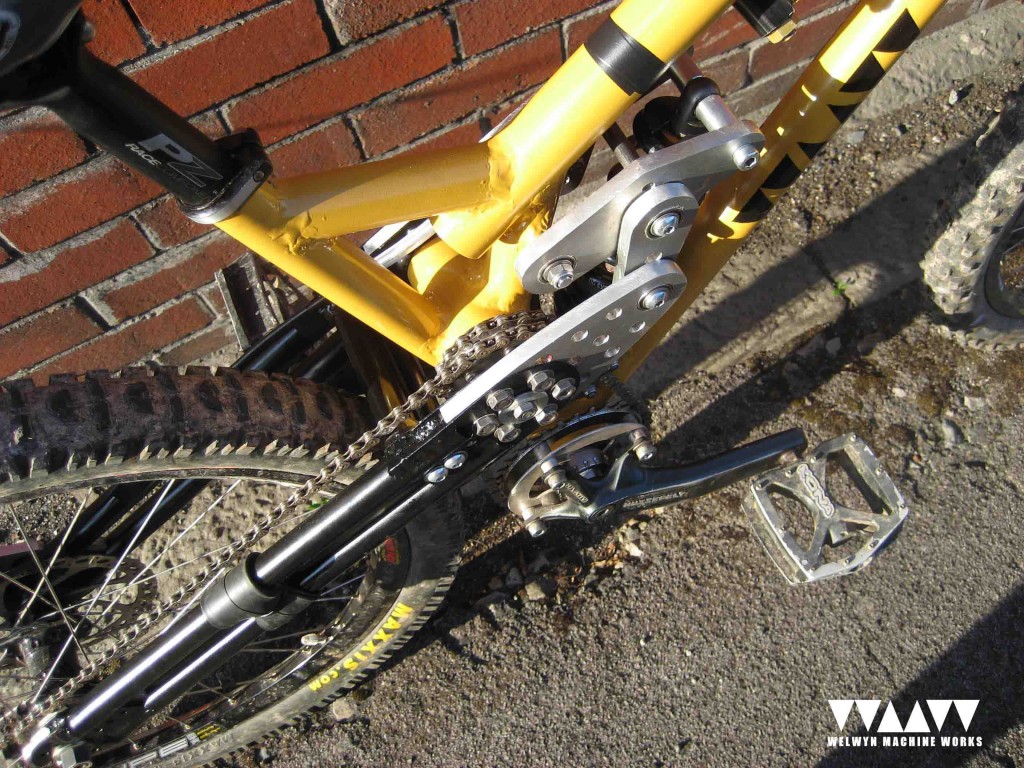
Initially I was aiming to copy the main features of the BMW’s race link – high pivot point, jack drive (two chain system) to isolate peddling from suspension action and low centre of gravity, (Also nicked the idea for the bike/blog name).
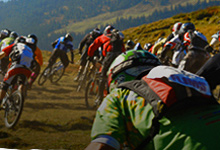
As things turned out there was quite a gap between initially being inspired to build and actually getting in a position to do so. There was a long period of design exploration and learning to fillet braze at evening classes. Having gone round in circles with the design, it turned out that an experience at a really muddy Dragon Downhill race in Caerphilly revised the design aims – as follows:
• 170-180mm travel
• Rearward wheel travel
• Single pivot simplicity (ignoring the fancy shock linkages)
• Maximum mud clearance
• Singlespeed – again for simplicity and quietness
• Constructional simplicity (nearly all the experienced frame builders advise on building a hardtail as first frame.. but where’s the fun in that!)
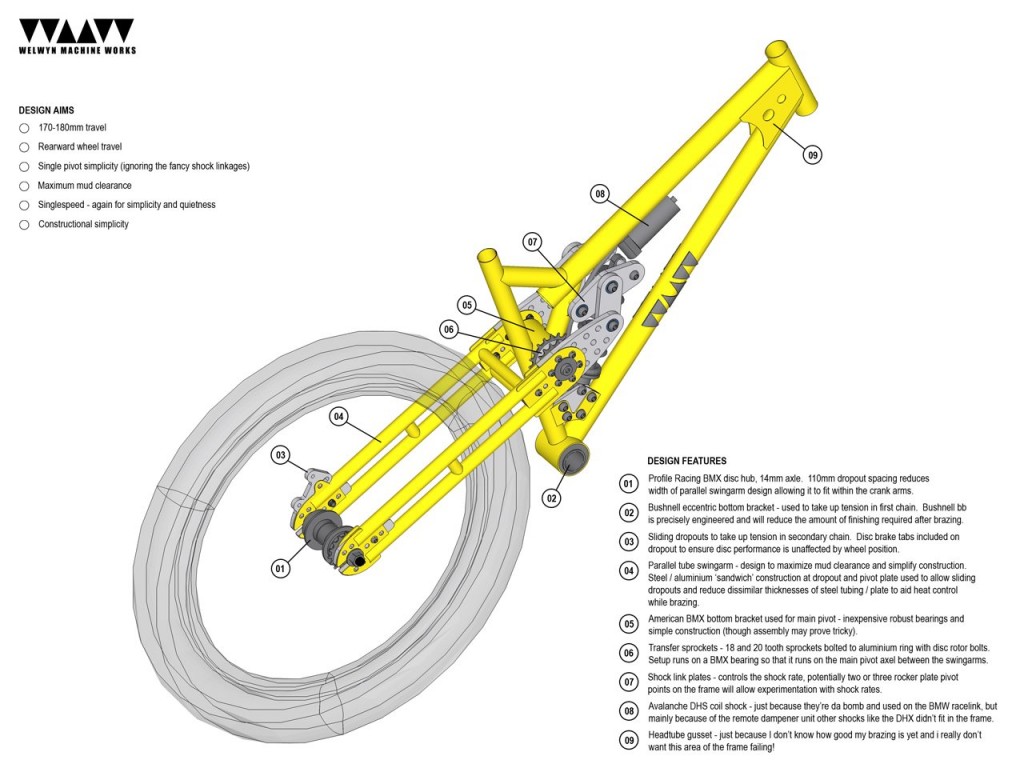
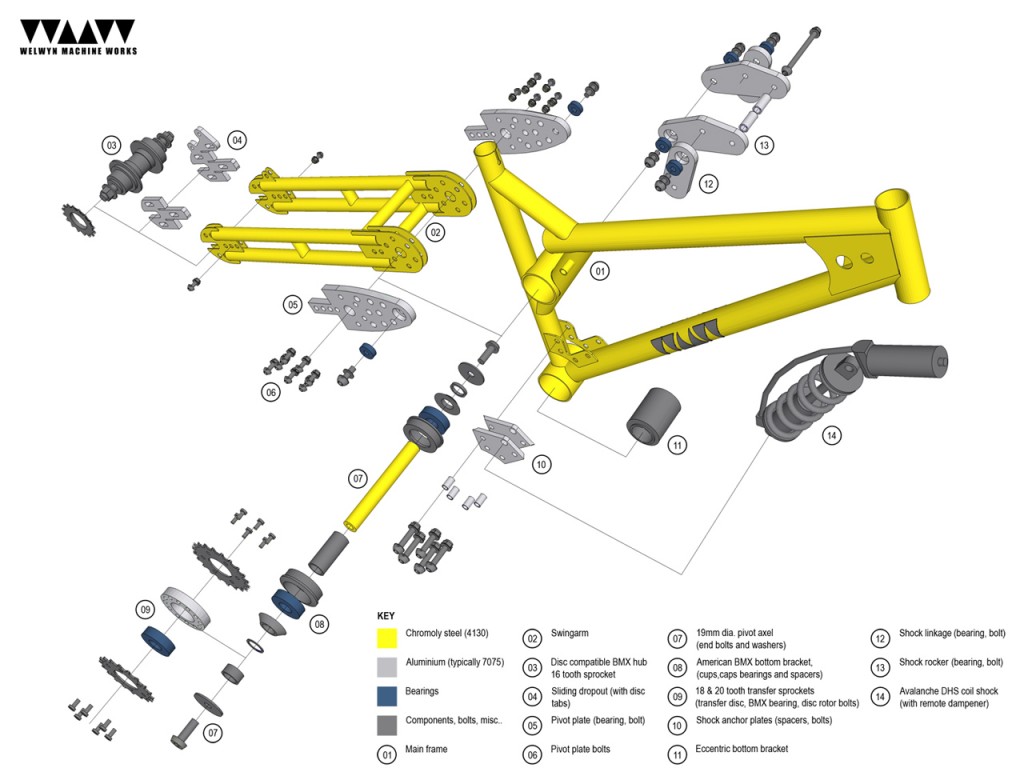
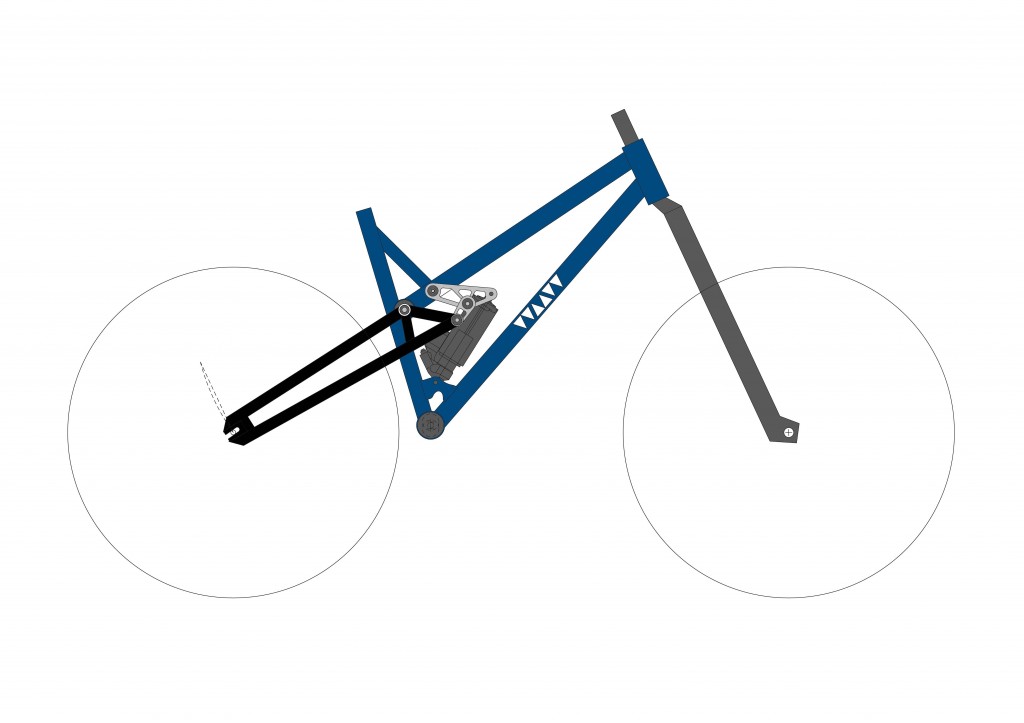
I used to use CAD daily as part of my job drawing building details, so got the know how produce designs through that. I design mainly in 2D using CAD, and then used the 2D elevations/sections as a base to make a 3D model. The CAD images are a bit geeky, but I like the old skool exploded type drawings, so what the hell. Plus they’ve been useful to include in my portfolio for interviews.
I’ve tried to make up for having no formal engineering education, by researching frame building and design on t’internet. There’s an amazing amount of information out there regarding bike design and fabrication, which helped make the whole project achievable. Having seen what other builders are using material wise and studying a hell of a lot of pics of bike frames, I tend to go by -‘ if it looks ok hopefully it’ll be ok’.
Construction
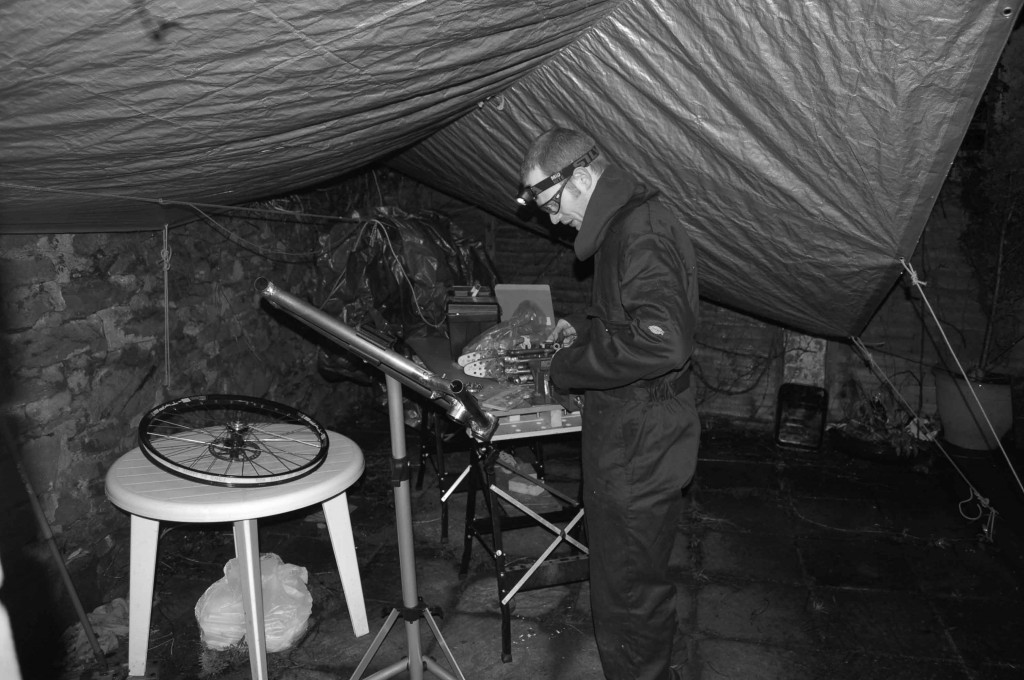
One of the main obstacles I had to overcome with this project is that I didn’t have a decent workspace. In the end I resulted to stretching a tarpaulin across the back yard to keep the worst of the weather at bay. Available tooling was limited to hacksaw, files, emery cloth and a pillar drill. All the metal parts were cut/shaped by hand using these tools, with pretty reasonable results.
The actually fabrication of the frame all went a bit ‘Scrapheap Challenge’ when the only foreseeable window of opportunity to hire an oxy acetylene torch and get a clear crack at building this thing was over the 2008 Christmas holiday. What followed a relaxing Christmas day was 8-9 frantic days working, against the deadline of having to go back to work and losing access to the welding equipment.
The hardest part of the build was making and setting up the bloody frame jig, and whole experience was super frustrating, as just when you thought you had everything aligned something would shift and throw out everything else.
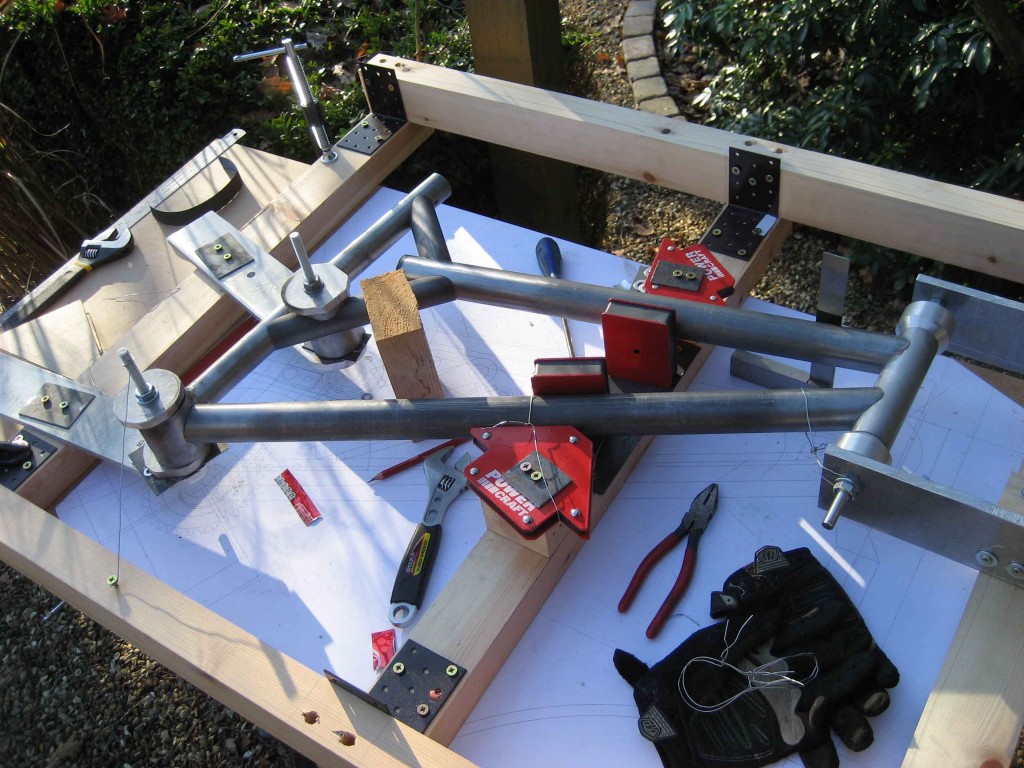

Tacked up in the jig.
Conditions weren’t ideal for brazing as it was bloody cold that Christmas and it was tricky getting heat into the tubes and keeping it there, to get the brass to flow. I’d be the first to point out the joints aren’t the prettiest around, but a hell of a lot of brass went into them, so hopefully there are some tidy internal fillets.

Fillet brazing
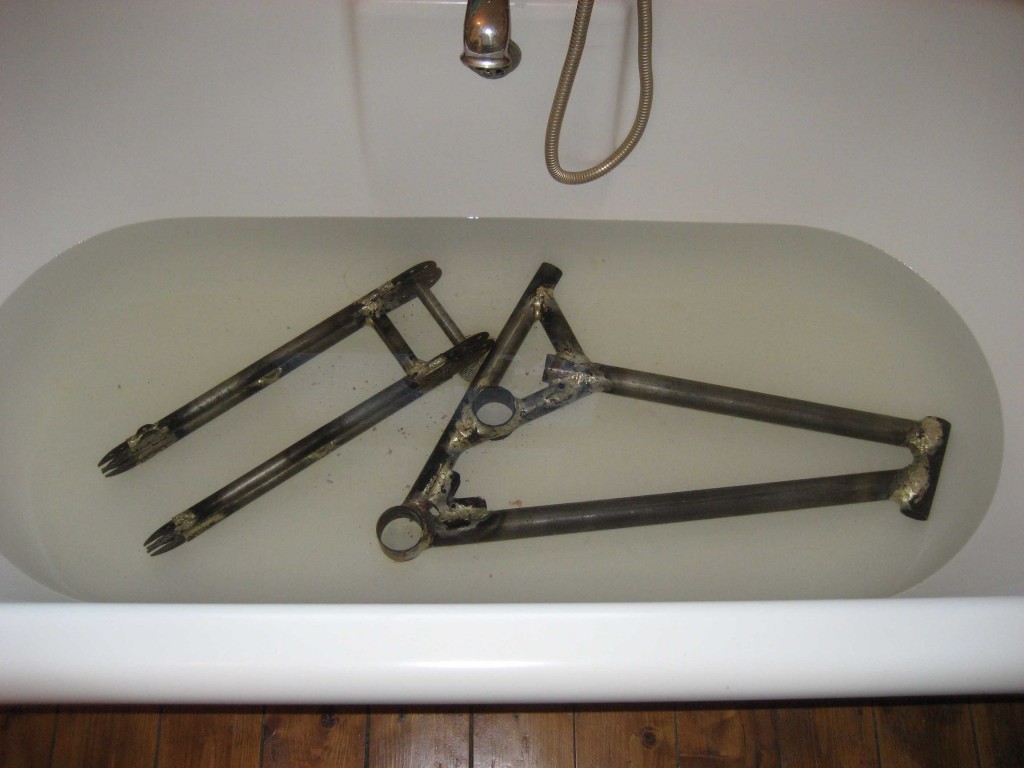
Soaking the flux off
Assembly begins
Facts n figures
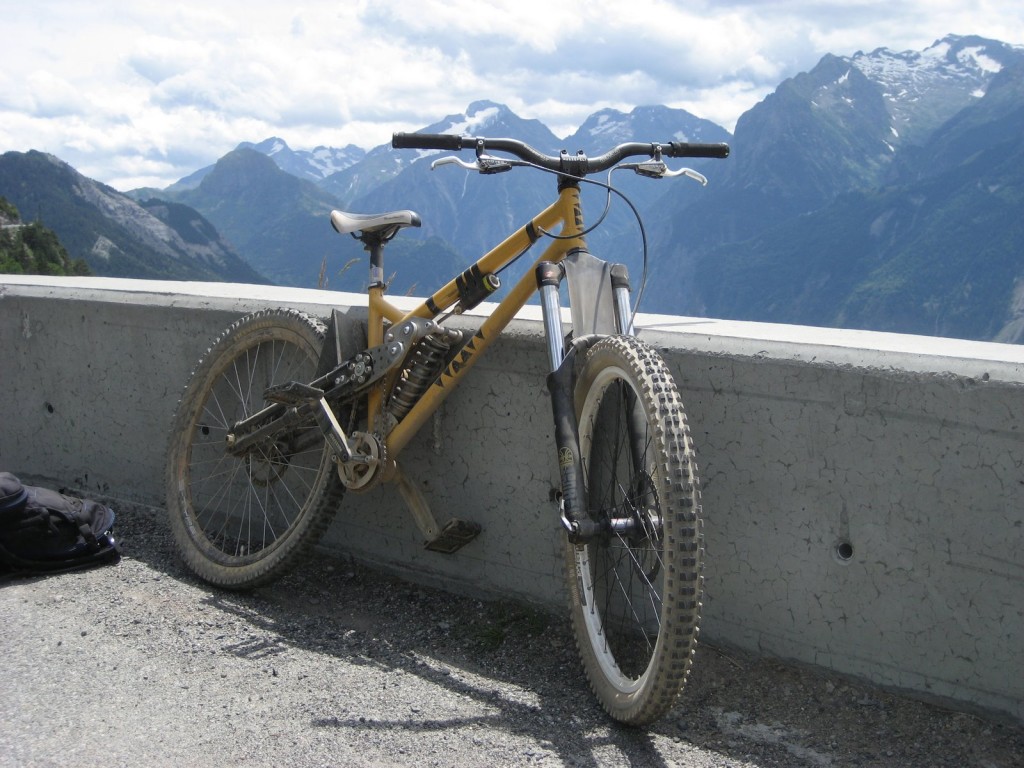
• 66 deg head angle.
• Total bike weight rough 46lbs.
• BB height is quite tall, but that suits me.
• Bearings to linkages are held in place by shims made from Oranjeboom beer cans!
• Shock bushings for first test ride were also bodged together from beer cans.
• Rear wheel uses a Profile Racing BMX disc hub.
• Rear shock is a secondhand Avalanche unit – which I seemed to have lucked out with the spring rate.
Before test ride
After first test ride.
WMW 28
Mega 2009
The ride
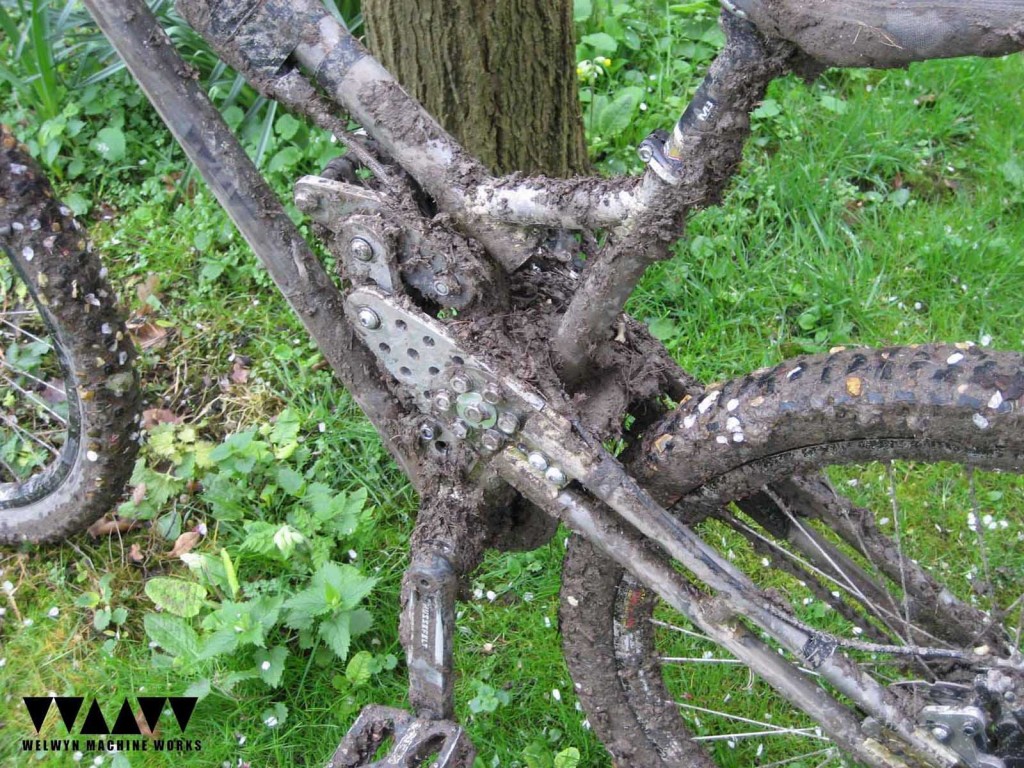
I haven’t ridden many downhill bikes so can’t really compare mine against them, but I think the fundamentals seem to be right. The first test ride was initially a little disappointing, as other than a few nerves it felt pretty normal with no major quirks. To me it feels good at speed and the suspension is pretty plush and soaks up the trail well. The single speed gearing is just about right if a little hard on the flatter sections, and other than the profile hub buzzing away it was pretty damn quiet on the rough stuff, so its living up to its name – s.v.b (silent but violent).
I took it out to Chatel last year and it survived seven days back to back riding, which was a real buzz, something I was hoping to relive this year, but unfortunately it wasn’t to be.
I know it’s pretty agricultural in it terms of the execution of its construction (which is something I’m hoping to improve on with the next frame) but I have to say I think I enjoy riding it all the more for this. I like its scruffy nature and it suits my sketchy riding.
Yellow heavy slow
Next time?
Lessons learnt, and future aims:
Simplify the construction – reduce the reliance on bolts.
Lighten – reduce size of linkages, and use of bolts.
Longer front triangle, and shorter swingarm / chainstay length
Slacker head angle and reduced suspension travel.
Review cable routing – decent routing is a black art.
Keep singlespeed setup, basic suspension layout and mud clearance
TIG welded instead of fillet brazing – I don’t like the responsibility of handling acetylene tanks.
wmw mk2 – mighty matey
How much did the project cost? – now thats the question I’ve so far managed to avoid finding an anwser to! Somewhere I’ve got the most of the receipts squirrelled away, but I’ve deliberately not added it all together. Put it this way frame building isn’t a cheap hobby, and probably not the cheapest way to get yourself a frame (unless you already have access to and the skills to use all the tooling e.g. lathe, welder), but I was able to spread the costs over quite a long time.
The actual materials aren’t that cheap, and often a bit hard to find, with some getting sourced from the US. It’s the little things that all start to add up e.g. delivery charges (metal isn’t light!), import tax, consumables, welding gear (in this case the hire of). As a pure guess maybe the whole bike was in the region of £1500 (using some secondhand and donated items), but I could be way off.
Hopefully the above has been interesting, and shows what can be achieved with pretty limited resources. It’s hard work but definitely worth the effort when you’re left grinning ear to ear at the bottom of a run!
Finally I’d like to say a quick thanks to anyone who’s helped out along the way, with this project.
Cheers,
Mark
![]()
If you have built your own homebrew bike then get in touch with Billy